Say Goodbye to Backlight Bleed!
In this guide, we’ll walk through simple yet effective steps to fix backlight bleed on our TV. Let’s reclaim our viewing experience together and enjoy our favorite shows without distractions!
What We’ll Need
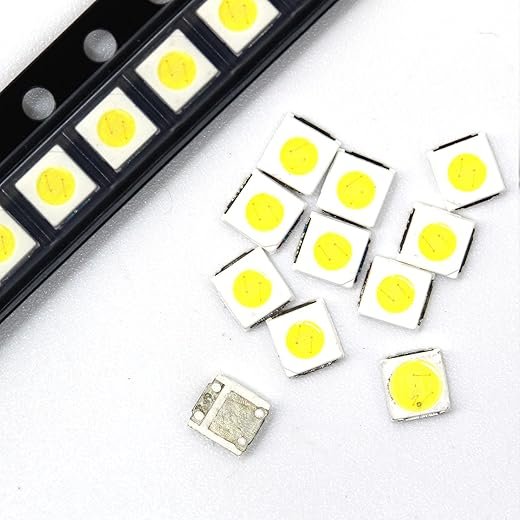
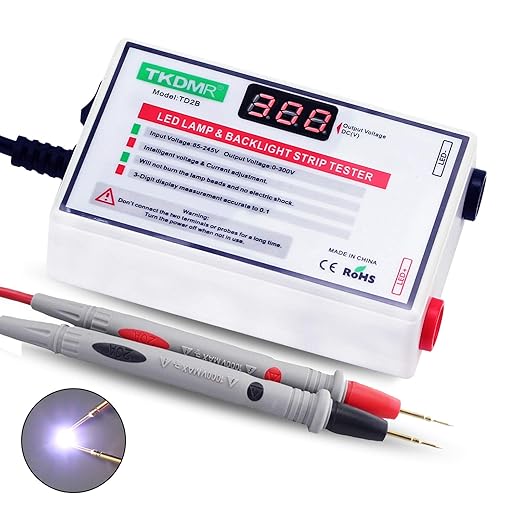
Before we dive in, let’s gather the tools and materials necessary for this fix. We’ll need:
Step 1: Assessing the Bleed
Is Your TV Suffering from Backlight Bleed? Let’s Find Out!Identify the areas affected by backlight bleed. First, let’s have some fun with our TV! Turn off the lights in the room and set the TV to a dark scene, or use the black screen test available online.
Look closely at the edges of the screen. Are there any patches of light bleeding into the dark areas?
Note the intensity of the bleed in different corners—particularly the top, bottom, and sides. Is it severe or just a minor annoyance? By taking note of these details, we’ll have a better understanding of the problem before we dive into fixing it.
To keep our findings organized, we can jot them down. This will help us track our progress as we move through the following steps. Let’s get ready to tackle the backlight bleed together!
Step 2: Disassembling the TV
Ready to Get Hands-On? Let’s Open Her Up!Gather our tools. Before we start, we’ll need a few essential items: a screwdriver set (preferably magnetic), a soft cloth to prevent scratches, and a container for screws.
Prepare a clean workspace. Set your TV on a flat, stable surface, ensuring there’s ample space around it.
Remove the back cover. Begin by locating the screws holding the back panel in place. Using our screwdriver, carefully unscrew each one and place them in our container to avoid losing them.
Pry open the back cover gently. Use a soft cloth to cushion the edges while we apply slight pressure to pry it loose. Be cautious around any sensitive components; we don’t want to damage any parts inside.
Stay aware of cable connections. As we lift the back cover, pay attention to any cables attached. If they’re connected, gently disconnect them while noting where each connects. This attention to detail will help us reassemble everything seamlessly later on.
Now, let’s see what’s inside our TV!
Step 3: Adjusting the Backlight Settings
Could the Solution Be as Simple as a Few Button Presses?Access the TV settings menu. Now that we’ve assessed the problem and gained access to our TV, it’s time to make some adjustments. Using our remote, let’s navigate to the settings menu—usually represented by a gear icon.
Locate the backlight and contrast settings. Within the picture settings, we’ll find options for backlight and contrast.
Lower the backlight level. Starting with the backlight, we can reduce this setting slightly. A drop of around 10-20% may significantly reduce bleed while maintaining overall picture quality.
Adjust the contrast carefully. Next, let’s tweak the contrast. A balanced contrast can help enhance darker scenes without amplifying the bleed. If we find the dark areas becoming too dim, we can always adjust it back up a notch.
Test our changes. After making these adjustments, it’s wise to rerun our dark scene test. We should notice a difference and a clearer, more enjoyable viewing experience! By fine-tuning these settings, we’re taking an important step toward minimizing backlight bleed.
Step 4: Reassembling and Testing
What If Our Fix Works Wonders? Let’s Test It!Reattach the back cover. Now that we’ve made our adjustments, it’s time to put everything back together. Gently place the back cover onto the TV, ensuring it aligns correctly with all the edges.
Secure it with screws. Using our previously collected screws, we’ll fasten the back panel. Tighten them just enough to keep everything in place—over-tightening can cause stress fractures.
Reconnect any cables. If we disconnected any cables earlier, now is the moment to plug them back in, taking care to match each connection to where it belongs.
Power up the TV. Plug the TV back into the power outlet and turn it on. Let’s go back to our dark scene test to see how well our adjustments worked.
Evaluate the results. Watch for any remaining light bleed. Have our tweaks made a difference? If not, we may want to revisit previous steps and make further adjustments. This is where our hard work pays off!
Enjoy a Better Viewing Experience!
By following these steps, we can significantly reduce backlight bleed and enhance our TV experience. Let’s celebrate our newfound skills! Are we ready to explore even more ways to optimize our viewing environment?


I’m impressed! Never thought I’d be able to fix my TV! The first step was the hardest, but once I got past that, it was smooth sailing. Now I can actually watch movies without getting distracted by the bleed! 🎉
Great to hear, Olivia! Enjoy your movie nights without distractions!
Yay! That’s what I like to hear! What movie are you binging next? 😄
So, I attempted this and the backlight issue is better, but not perfect. Is it worth attempting again or do you think I should just live with it?
Good question, Nancy! If it’s improved, you might be on the right track. Sometimes small tweaks can make a big difference!
If it’s better, that’s a win! But if it’s still bothering you, maybe just try adjusting the settings again? It worked for me!
Wow, this guide is a lifesaver! I had no idea my TV’s backlight bleed could be fixed so easily. The step about adjusting the backlight settings made all the difference. No more cloudiness during dark scenes! Thanks for putting this together! 😄
I totally agree! I was about to give up on my TV, but this made it feel brand new. What did you adjust in your settings? I’m curious!
Thanks for the feedback, John! Adjusting the settings can really enhance your viewing experience. Let us know if you need any more tips!
The backlight bleed was driving me nuts! I was worried I’d have to buy a new TV. This guide saved me a ton of cash. The only thing I wish there were was a video tutorial. Anyone know of one?
That’s a great suggestion, Chris! We’ll consider putting together a video in the future. Thanks for the input!
I was thinking the same thing! A video would definitely help with some of the tricky parts.
I’m not super handy, so I was skeptical about doing this myself. But your step-by-step really helped. I didn’t even break anything! 😂 Thanks for making it so easy to follow!
Glad to hear it, Tommy! Sometimes it just takes a little courage to dive in. If you have any questions, feel free to ask!
I tried this out last weekend and it was… interesting. Disassembling my TV felt a bit risky, but I followed the guide step by step. I think I might’ve put it back together wrong though; it makes a weird noise now. Any advice? 🤔
Hi Emily! If it’s making a noise, it’s worth opening it back up to check for any loose parts. Better safe than sorry!
I had a similar scare! Just double-check everything. You got this! 👍
Oh no, I think I read that you should check if the screws are all tightened. I had a similar issue once!
Honestly, I didn’t think I could fix my TV. I mean, I barely know how to change a lightbulb! But this guide made it pretty straightforward. The hardest part was just getting the back off. 😂 Thanks for the tips!
You’re welcome, Lisa! It can be a bit tricky at first, but with practice, you’ll get the hang of it! Let us know how your TV is performing now!
I gotta say, I was skeptical about DIY fixes, but you guys nailed it! The backlight bleed is way less noticeable now. Definitely going to recommend this guide to my friends! 👍
Thanks for sharing, Jake! We appreciate the recommendations! Let us know if you want more tips in the future!
That’s awesome, Jake! It’s nice to see more people giving DIY a shot. Saves so much money!